
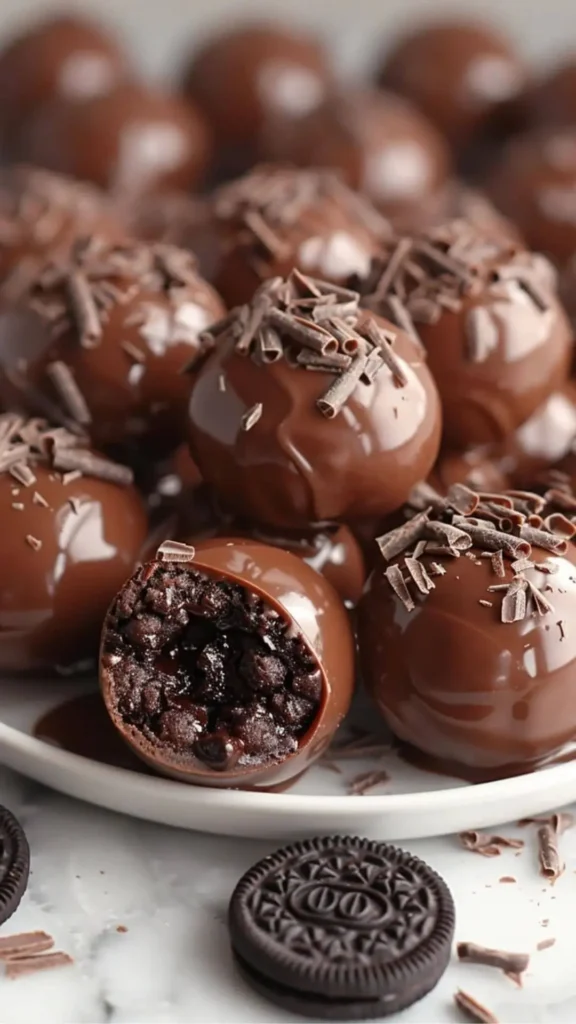
When it comes to effortless desserts that require minimal ingredients and zero baking, 3 Ingredients Oreo Balls top the list. These bite-sized treats combine the rich chocolate flavor of Oreos, the creamy texture of cream cheese, and the smooth decadence of melted chocolate all in a simple, no-fuss recipe.
Whether you’re a beginner in the kitchen or an experienced baker looking for a quick dessert, Oreo balls are perfect for any occasion. In this article, we’ll break down everything you need to know, from ingredients to expert tips for flawless results.
Table of Contents
Why This Recipe is a Game-Changer
Minimal Ingredients, Maximum Flavor
Many desserts require a long list of ingredients, but this recipe proves that less is more. With just three ingredients, you get a delightfully rich, creamy, and chocolatey treat that tastes like it took hours to make.
No-Bake Convenience: A Perfect Quick Treat
Forget about preheating the oven or worrying about baking times these Oreo balls require no baking whatsoever. The process is straightforward: crush, mix, roll, dip, and chill. That’s it!
Ideal for Any Occasion: Parties, Holidays & More
These Oreo truffles are perfect for holiday gatherings, birthday parties, weddings, and even casual snacks. Their elegant look makes them seem fancy, yet they’re incredibly easy to prepare.
Ingredients Breakdown: What You Need
Before diving into the step-by-step guide, let’s break down the three essential ingredients.
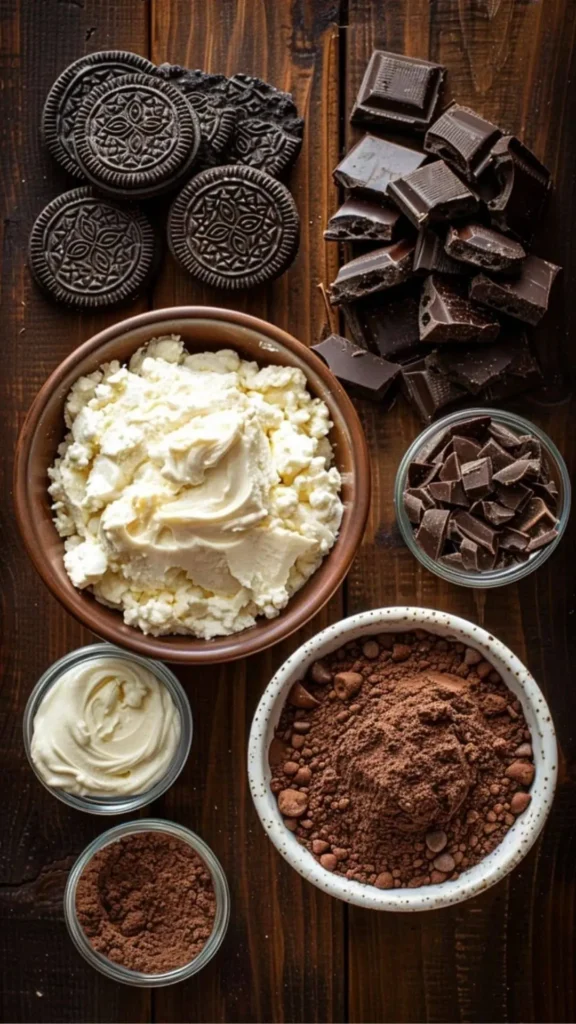
Choosing the Best Oreos for the Recipe
The star of this dessert is Oreo cookies. Here’s what to consider:
- Classic Oreos: The traditional choice, offering the perfect balance of chocolatey crunch and creamy filling.
- Double Stuf Oreos: Adds extra creaminess but may require slight adjustments in cream cheese.
- Golden Oreos: A great alternative if you prefer a vanilla twist.
- Flavored Oreos: Mint, peanut butter, or birthday cake Oreos can add a unique spin.
Selecting the Right Cream Cheese for the Perfect Texture
Cream cheese binds the crushed Oreos together, creating a smooth and truffle-like consistency. Here’s what works best:
- Full-fat cream cheese: Gives the richest and creamiest texture.
- Reduced-fat cream cheese: Works fine but may slightly alter the creaminess.
- Flavored cream cheese: A fun way to add subtle undertones like strawberry or chocolate.
💡 Pro Tip: Always use room-temperature cream cheese for easier mixing.
Chocolate Coating Options: Dark, Milk, or White?
The final layer of chocolate coating gives Oreo balls their signature smooth, glossy finish. Your options include:
- Milk Chocolate: Sweet and creamy, perfect for a classic taste.
- Dark Chocolate: Ideal for a rich and slightly bitter contrast.
- White Chocolate: A great option for decorative variations.
Step-by-Step Guide: How to Make 3 Ingredients Oreo Balls
Now that you have your ingredients ready, let’s go through the simple process of making these delicious no-bake Oreo truffles.
Step 1: Crushing the Oreos to the Right Consistency
The first step is breaking down the Oreos into fine crumbs. Here’s how:
- Food Processor Method: Place the Oreos (including the filling) into a food processor and pulse until they turn into fine crumbs.
- Ziploc Bag & Rolling Pin Method: If you don’t have a food processor, place the Oreos in a sealed bag and crush them with a rolling pin until finely ground.
💡 Pro Tip: Make sure there are no large chunks for a smoother mixture.
Step 2: Mixing with Cream Cheese for the Perfect Dough
Next, combine the crushed Oreos with softened cream cheese:
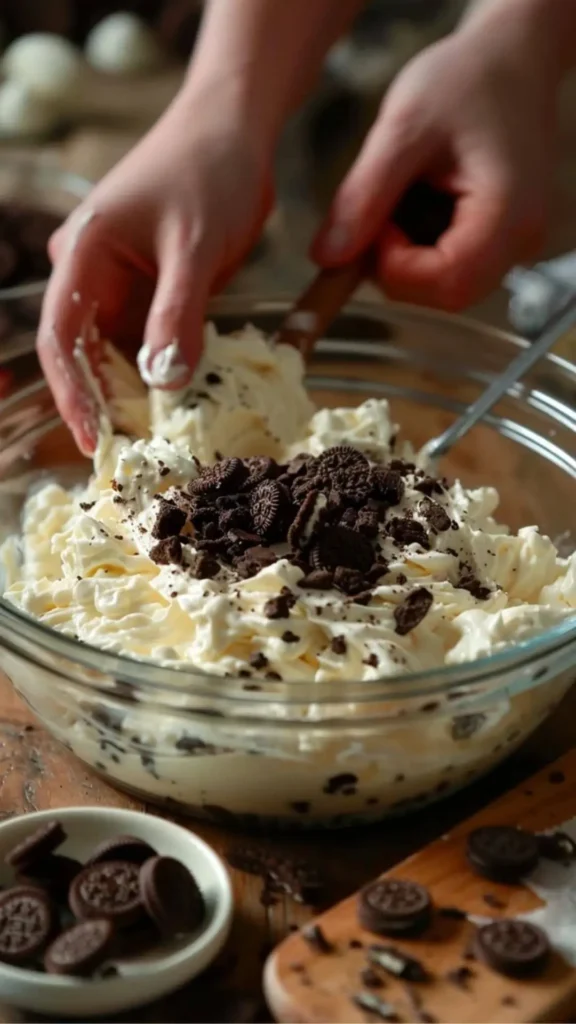
- In a large bowl, mix the Oreo crumbs with the cream cheese using a spoon or spatula.
- Continue mixing until the texture is smooth and dough-like.
- The mixture should be firm yet easy to roll.
💡 Pro Tip: If the dough feels too sticky, refrigerate it for 10–15 minutes before rolling.
Step 3: Rolling and Shaping the Balls
Now comes the fun part shaping the Oreo balls.
- Use a small cookie scoop or a spoon to scoop out equal portions.
- Roll each portion into a smooth, round ball using your hands.
- Place the balls on a parchment-lined baking sheet.
💡 Pro Tip: If the mixture is sticking to your hands, lightly coat them with non-stick spray or a bit of cocoa powder.
At this stage, place the rolled balls in the freezer for about 20 minutes to firm up before dipping them in chocolate.
Step 4: Dipping in Melted Chocolate for a Smooth Finish
Once the Oreo balls have firmed up in the freezer, it’s time for the final step coating them in melted chocolate.

How to Melt the Chocolate Correctly
You have two easy methods for melting chocolate:
- Microwave Method:
- Place chopped chocolate or chocolate chips in a microwave-safe bowl.
- Heat in 30-second intervals, stirring after each round until fully melted.
- Avoid overheating, as chocolate can burn quickly.
- Double Boiler Method:
- Fill a saucepan with an inch of water and bring to a simmer.
- Place a heat-safe bowl over the saucepan, ensuring it doesn’t touch the water.
- Stir the chocolate continuously until melted and smooth.
💡 Pro Tip: If the melted chocolate is too thick, add 1 teaspoon of coconut oil or vegetable shortening to thin it out for easier coating.
Dipping the Oreo Balls
- Use a fork or dipping tool to submerge each ball in the melted chocolate.
- Gently tap off excess chocolate by tapping the fork against the bowl’s edge.
- Place the coated balls back onto the parchment-lined baking sheet.
💡 Pro Tip: If the chocolate starts to harden, reheat it briefly in the microwave or over the double boiler.
Step 5: Letting Them Set & Enjoying the Treat
Once dipped, let the Oreo balls harden at room temperature or in the refrigerator for about 30 minutes. If you’re in a rush, you can pop them in the freezer for 10 minutes.
Optional: Before they set, sprinkle toppings like crushed Oreos, sprinkles, or sea salt for added flavor and decoration.
Tips for the Best Oreo Balls Every Time
Avoiding Common Mistakes
Even though this recipe is simple, a few common pitfalls can be avoided:
Using too much cream cheese: The mixture becomes too soft and sticky. Stick to the recommended ratio.
Skipping the chilling step: The dough and coated truffles won’t hold their shape.
Overheating chocolate: Burnt chocolate ruins the texture. Always melt in short intervals.
How to Achieve a Smooth Chocolate Coating
- Use high-quality chocolate for the best texture.
- Ensure the Oreo balls are cold before dipping so the chocolate sets quickly.
- Work in small batches to prevent the chocolate from cooling down too fast.
Storage and Shelf Life Tips
- Refrigeration: Store in an airtight container in the fridge for up to 1 week.
- Freezing: Oreo balls freeze well for up to 3 months. Thaw in the fridge before serving.
Fun Variations to Try
Want to mix things up? Try these fun twists!
Adding Sprinkles, Nuts, or Drizzles
- Sprinkles: Festive and colorful for holidays and birthdays.
- Chopped Nuts: Adds crunch try almonds, peanuts, or pecans.
- White or Dark Chocolate Drizzle: For an elegant touch.
Flavored Cream Cheese Twists
- Peanut Butter Cream Cheese: A peanut butter Oreo truffle variation.
- Strawberry Cream Cheese: Adds a fruity contrast to the chocolate.
Themed Oreo Balls for Holidays and Special Occasions
- Christmas: Red and green sprinkles with white chocolate.
- Halloween: Crushed Oreo “dirt” on top for a spooky effect.
- Valentine’s Day: Pink drizzle or heart-shaped sprinkles.
Serving Suggestions and Pairing Ideas
Best Drinks to Pair with Oreo Balls
These truffles go well with:
Coffee or Espresso – Balances the sweetness with a bold flavor.
Milk – The classic pairing for Oreos.
Red Wine – A sophisticated pairing, especially with dark chocolate coating.
Creative Dessert Platters Featuring Oreo Balls
- Oreo Ball & Cookie Tray – Serve with chocolate chip cookies and brownies.
- Mini Dessert Buffet – Combine with cake pops and chocolate-covered strawberries.
- Ice Cream Sundae Bar – Crumble Oreo balls over vanilla ice cream.
Frequently Asked Questions (FAQs)
Can I Make Oreo Balls Without Cream Cheese?
Yes! Substitute cream cheese with:
- Sweetened condensed milk for a caramel-like texture.
- Peanut butter for a nutty twist.
- Nutella for a rich, chocolate-hazelnut flavor.
How Do I Store Oreo Balls Properly?
Keep them in an airtight container in the fridge to prevent them from becoming too soft.
Can I Freeze Oreo Balls for Later?
Absolutely! Freeze in an airtight container for up to 3 months. Thaw in the fridge before serving.
What’s the Best Way to Melt Chocolate for Dipping?
The double boiler method is best for smooth, lump-free chocolate, but the microwave method is quicker if done carefully.
Conclusion: Why You Should Try 3 Ingredients Oreo Balls Today
Easy, delicious, and requiring only three ingredients, Oreo Balls are the perfect no-bake treat. Whether you’re making them for yourself, family, or friends, their chocolatey, creamy goodness is guaranteed to impress.
Now that you know the secret to perfect Oreo Balls, it’s time to grab your ingredients and start rolling!